We can absolutely develop this lab atmosphere on our own
components, but due to the level of SharePoint 2013 components specifications,
many of us may not have adequate extra components to apply an on-premise lab
atmosphere.
This creates a great situation for utilizing our Windows
Pink FREE 90-day Test Provide to develop a no cost lab atmosphere for
SharePoint 2013 in the reasoning. Using the procedure defined here, we will be
able to develop a primary efficient village atmosphere for SharePoint 2013 that
will be available for 105 time of estimate utilization each 30 days at no cost
to you under the 90-day Test Provide.
After the 90-day free trial is up, you can select if you'd like
to turn to a complete compensated registration. If you are examining innovative
SharePoint 2013 circumstances and need more sources than available in the lab
settings below, you can certainly scale-up or scale-out elastically by
provisioning bigger VMs or extra SharePoint web and program hosting server VMs.
SharePoint 2013 Lab Server Slicing
To provide an efficient and extended lab atmosphere, I'll be
walking through the strategy of provisioning a SharePoint Hosting server 2013
on Windows Pink VMs as portrayed in the following structure plan that will
require around three VMs on a common Windows Pink Exclusive Network.
Prerequisites
Please follow my previous article on How to Setup SharePoint 2013 with Windows Azure.
Setting up the Environment
How to Register a DNS Server in Windows Azure
Register the internal IP address that our domain controller VM will be using for Active Directory-integrated Dynamic DNS services by performing the following steps:
- Sign in at the Windows Azure Management Portal with the logon credentials used when you signed up for your Free 90-Day Windows Azure Trial.
- Select "Networks" located on the side navigation panel on the Windows Azure Management Portal page.
- Click the "+NEW" button located on the bottom navigation bar and select "Networks" - "Virtual Network" - "Register DNS Server".
- Complete the DNS Server fields as follows:
- NAME: MYlabdns01
- DNS Server IP Address: 10.0.0.4
- Click the "REGISTER DNS SERVER" button.
Define a Virtual Network in Windows Azure
Define a common virtual network in Windows Azure for running Active Directory, Database and SharePoint virtual machines by performing the following steps:
- Sign in at the Windows Azure Management Portal with the logon credentials used when you signed up for your Free 90-Day Windows Azure Trial.
- Select "Networks" located on the side navigation panel on the Windows Azure Management Portal page.
- Click the "+NEW" button located on the bottom navigation bar and select "Networks" - "Virtual Network" - "Quick Create".
- Complete the Virtual Network fields as follows:
- NAME: Mylabnet01
- Address Space: 10.---.---.---
- Maximum VM Count: 4096 [CIDR:/20]
- Affinity Group: Select the Affinity Group defined in the Getting Started steps from the Prerequisites section above.
- Connect to Existing DNS: Select Mylabdns01 - the DNS Server registered in the above steps.
- Click the "CREATE A VIRTUAL NETWORK" button.
Configure Windows Server Active Directory in a Windows Azure VM
Provision a new Windows Azure VM to run a Windows Server Active Directory domain controller in a new Active Directory forest by performing the following steps:- Sign in at the Windows Azure Management Portal with the logon credentials used when you signed up for your Free 90-Day Windows Azure Trial.
- Select Virtual Machines located on the side navigation panel on the Windows Azure Management Portal page.
- Click the "+NEW" button located on the bottom navigation bar and select "Compute" - "Virtual Machines" - "From Gallery".
- In the Virtual Machine Operating System Selection list, select "Windows Server 2012, December 2012" and click the button.
- On the Virtual Machine Configuration page, complete the fields as follows:
- Virtual Machine Name: Mylabad01
- New Password and Confirm Password fields: Choose and confirm a new local Administrator password.
- Size: Small (1 core, 1.75GB Memory)
- Click the button to continue.
- On the Virtual Machine Mode page, complete the fields as follows:
- Standalone Virtual Machine: Selected
- DNS Name: Mylabad01.cloudapp.net
- Storage Account: Select the Storage Account defined in above steps
- Region/Affinity Group/Virtual Network: Select "Mylabnet01 - the Virtual Network" defined in above steps.
- Virtual Network Subnets: Select "Subnet-1 (10.0.0.0/23)"
- Click the button to continue.
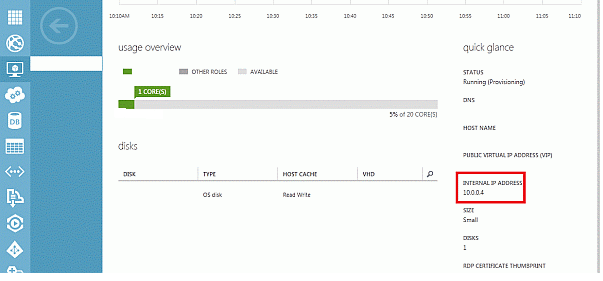
- After the new virtual machine has finished provisioning, click on the name "Mylabad01" of the new Virtual Machine displayed on the Virtual Machines page of the Windows Azure Management Portal.
- On the virtual machine details page for Mylabad01, make note of the Internal IP Address displayed on this page. This IP address should be listed as 10.0.0.4.
- On the virtual machine details page for Mylabad01, click the "Attach" button located on the bottom navigation toolbar and select "Attach Empty Disk". Complete the following fields on the Attach an empty disk to the virtual machine form:
- Name: Mylabad01-data01
- Size: 10 GB
- Host Cache Preference: None
- On the virtual machine details page for Mylabad01, click the "Connect" button located on the bottom navigation toolbar and click the "Open" button to launch a Remote Desktop Connection to the console of this virtual machine. Logon at the console of your virtual machine with the local Administrator credentials
- From the Remote Desktop console please use how to install Active directory on the server
- Using the Server Manager tool, install Active Directory Domain Services and promote this server to a domain controller in a new forest with the following parameters:
- Active Directory Forest name:
- Volume Location for NTDS database, log and SYSVOL folders: F:
- Create two users for SharePoint configuration
- Type "dsa.msc" in run, you will get the AD console
- Right-click on the user then "new" - "User"
- Please provide the user name:
- Click "Next" and select the following options:
- This should be the service account we are going to use while installing SharePoint
- Better create two service accounts, as:
- One for installation of SharePoint
- One for Service configuration

Configure SQL Server 2012 in a Windows Azure VM
Provision a new Windows Azure VM to run SQL Server 2012 by performing the following steps:
Provision a new Windows Azure VM to run SQL Server 2012 by performing the following steps:
- Sign in at the Windows Azure Management Portal with the logon credentials used when you signed up for your Free 90-Day Windows Azure Trial.
- Select "Virtual Machines" located on the side navigation panel on the Windows Azure Management Portal page.
- Click the "+NEW" button located on the bottom navigation bar and select "Computer Virtual Machines - from Gallery".
- In the Virtual Machine Operating System Selection list, select "SQL Server 2012 Evaluation Edition" and click the button.
- On the Virtual Machine Configuration page, complete the fields as follows:
- Virtual Machine Name: Mylabdb01
- New Password and Confirm Password fields: Choose and confirm a new local Administrator password.
- Size: Medium (4 cores, 7 GB Memory)
- Click the button to continue.
- On the Virtual Machine Mode page, complete the fields as follows:
- Standalone Virtual Machine: Selected
- DNS Name: Mylabdb01.cloudapp.net
- Storage Account: Select the Storage Account defined in the Getting Started steps from the Prerequisites section above.
- Region/Affinity Group/Virtual Network: Select "Mylabnet01"
- Virtual Network Subnets: Select "Subnet-1 (10.0.0.0/23)"
- Click the button to continue.
- After the new virtual machine has finished provisioning, click on the name ("Mylabdb01") of the new Virtual Machine displayed on the Virtual Machines page of the Windows Azure Management Portal.
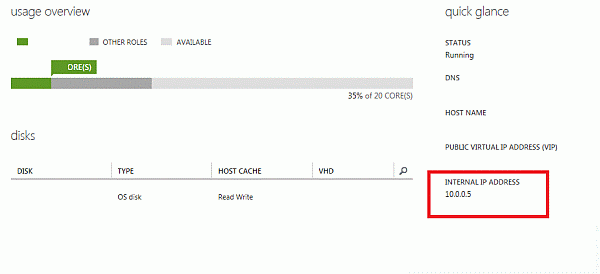
- On the virtual machine details page for Mylabdb01, make note of the Internal IP Address displayed on this page. This IP address should be listed as 10.0.0.5.
- On the virtual machine details page for MYlabdb01, click the "Attach" button located on the bottom navigation toolbar and select "Attach Empty Disk". Complete the following fields on the "Attach an empty disk to the virtual machine" form:
- Name: Mylabdb01-data01
- Size: 50 GB
- Host Cache Preference: None
- To allow SharePoint to connect to the SQL Server, you will need to add an Inbound Rule for the SQL Server requests in the Windows Firewall. To do this, open Windows Firewall with Advanced Security from "Start" - "All Programs" - "Administrative Tools"
- Select the Inbound Rules node, right-click it and select "New Rule" to open the New Inbound Rule Wizard.
- In the Rule Type page, select "Port" and click "Next".

- In the Protocols and Ports page, leave TCP selected, select Specific local ports, and set its value to 1433. Click "Next" to continue.
- In the Action page, ensure that "Allow the connection" is selected and click "Next".
- In the Profile page, leave the default values and click "Next".
- In the Name page, set the Inbound Rule's Name to SQLRule and click "Finish"
- Close the Windows Firewall with Advanced Security window.
- In the Rule Type page, select "Port" and click "Next".
- In the Server Manager tool, join this server to the domain and restart the server to complete the domain join operation.
- For this right-click on "My Computer" and select properties
- Click on "Change settings"
- After the server restarts, connect again via Remote Desktop to the server's console and login with the local Administrator credentials
- Open SQL Server Management Studio from "Start" | "All Programs" | "Microsoft SQL Server 2012 - SQL Server Management Studio" and add the "domain\Administrator" user to SQL Server with the Sysadmin server role selected.
- Expand Security folder within the SQL Server instance. Right-click Logins folder and select "New Login".
- In the General section, set the Login name to "domain\Administrator", and select the Windows Authentication option.
- Click "Server Roles" on the left pane. Select the checkbox for the Sysadmin server role.
- Click the OK button and close SQL Server Management Studio.
Configure SharePoint Server 2013 in a Windows Azure VM
- Sign in at the Windows Azure Management Portal with the logon credentials used when you signed up for your Free 90-Day Windows Azure Trial.
- Select Virtual Machines located on the side navigation panel on the Windows Azure Management Portal page.
- Click the "+NEW" button located on the bottom navigation bar and select "Compute" | "Virtual Machines" | "From Gallery".
- In the Virtual Machine Operating System Selection list, select Windows Server 2012, December 2012 and click the button.
- On the Virtual Machine Configuration page, complete the fields as follows:
- Virtual Machine Name: Mylabapp01
- New Password and Confirm Password fields: Choose and confirm a new local Administrator password.
- Size: Large (4 cores, 7GB Memory)
- Click the button to continue.
- On the Virtual Machine Mode page, complete the fields as follows:
- Standalone Virtual Machine: Selected
- DNS Name: Mylabapp01.cloudapp.net
- Storage Account: Select the Storage Account defined in the Getting Started steps from the Prerequisites section above.
- Region/Affinity Group/Virtual Network: Select Mylabnet01 - the Virtual Network defined in Exercise 2 above.
- Virtual Network Subnets: Select Subnet-1 (10.0.0.0/23)
- After the new virtual machine has finished provisioning, click on the name ( Mylabapp01 ) of the new Virtual Machine displayed on the Virtual Machines page of the Windows Azure Management Portal.
- On the virtual machine details page for MYlabapp01, make note of the Internal IP Address displayed on this page. This IP address should be listed as 10.0.0.6.
- On the virtual machine details page for Mylabapp01, click the Attach button located on the bottom navigation toolbar and select "Attach Empty Disk". Complete the following fields on the "Attach an empty disk to the virtual machine" form:
- Name: MYlabapp01-data01
- Size: 50 GB
- Host Cache Preference: None
- On the virtual machine details page for Mylabapp01, click the Connect button located on the bottom navigation toolbar and click the Open button to launch a Remote Desktop Connection to the console of this virtual machine. Logon at the console of your virtual machine with the local Administrator credentials defined in Step 5 above.
- In the Server Manager tool, click on Local Server in the left navigation pane and click on the Workgroup option. Join this server to the domain and restart the server to complete the domain join operation.
- After the server restarts, re-establish a Remote Desktop connection to the server and logon with the "domain\Administrator" domain user
- In the Server Manager tool, click on "Local Server" in the left navigation pane and select "IE Enhanced Security Configuration". Turn off enhanced security for Administrators and click the OK button.
- Press the Windows key to switch to the Start Screen and launch Internet Explorer. Download SharePoint preview and install as described in my following article
- Please follow my article http://sharepointsolution2010.blogspot.in/2013/03/how-to-set-up-three-tier-village-for.html
SPONSORS:
No comments:
Post a Comment